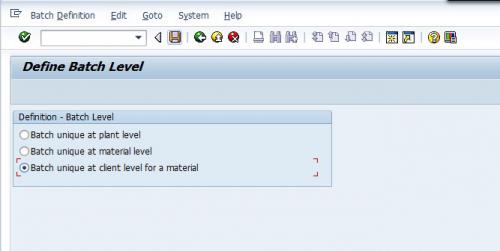
Batch Management Level
There are three different levels for Bath Management:
Plant Level
At a plant level, a Batch number is unique for a material inside a plant only. The same Batch number can be generated at another plant under the same Company, though these Batches are not the same. If a plant-to-plant stock transfer scenario is used, plant-level Batch numbering is not suitable.
Client Level
In this case, the Batch number is unique for the entire Client, meaning the same Batch number will not be generated for different Plants under the same Company Code. This method is useful when plant-to-plant stock transfer is used, and the Batch number is supposed to be unique.
Material Level
With this method, the Batch number will be unique at the material level only. Thus, in a given plant, different materials can have the same Batch number.
Batch Specifications Master Data Structure
Creation of Characteristics
Characteristics can have a fixed value, number range, or can pull values from SAP tables directly. For example, the production date of manufacturing of a produced goods can be found from production order table data, and manual intervention is not required.
During characteristics creation (Tcode CT04), we define how characteristics values will be maintained. Also, characteristics values can be blank so that it can be maintained at a material master classification view later on.
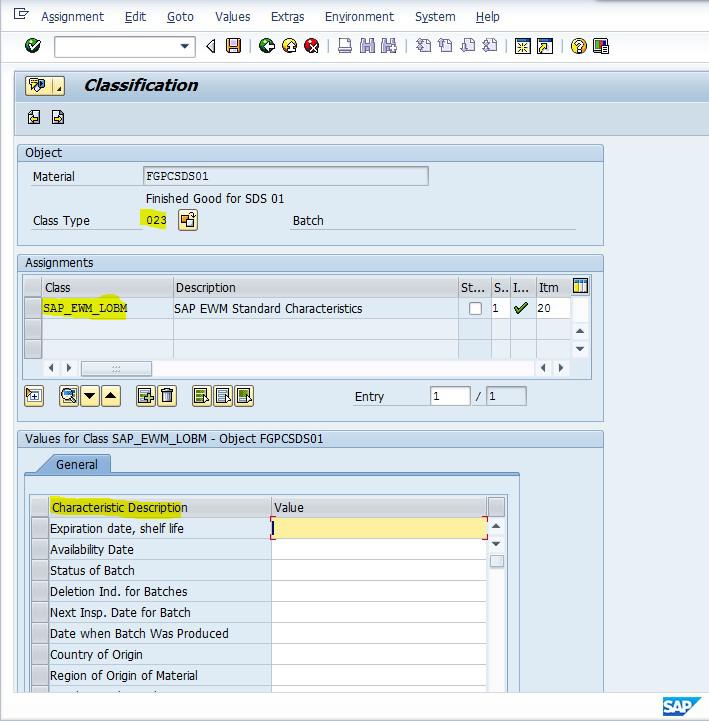
Creation of Class
All required characteristics are assigned into a Class (Tcode CL01) with class type 023 (Batch Class). In the figure above, ‘SAP_EWM_LOBM’ is the required class that holds all relevant characteristics.
Material Master Maintenance
Finally, the class with assigned characteristics is maintained in the material master classification view (Tcode MM01/MM02). Also, the Batch Management box is ticked in the material master view.
Define Batch Determination
Automatic Batch Determination is used in Inventory Management, Production, Sales & Distribution, and Warehouse Management. It is used to select batches and allocate them in a manufacturing order, an outbound delivery, or a goods issue/good receipt/goods transfer in Inventory Management.
In Production, Sales & Distribution, Inventory Management, or Warehouse Management, the batch determination is used to search and allocate batches for the components in production/process orders. Alternatively, batch determination is used to search and allocate the delivery batches in a customer-based outbound delivery or to search and allocate batches in goods issues.
Create Batch Determination Condition Technique
Once Batch determination condition tables have been created, they become the key combination fields for searching batches. Eventually, the condition records or search strategies are created as master data based on these key combinations. The Condition Tables are created separately for IM, Production, WM, and Sales.
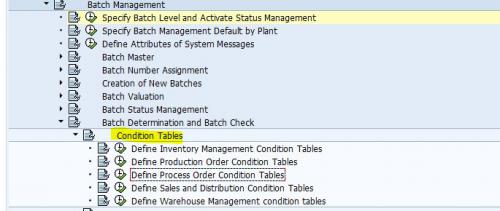
Different Menu Path for IM, PO, SD, and WM Relevant Condition Table
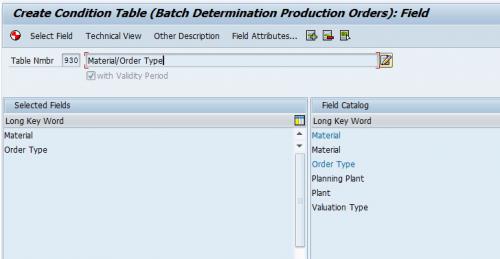
Fig. 4: Batch Condition Table for Production Order
Create Batch Determination Access Sequence
Batch determination access sequences have multiple condition tables (key combinations) assigned in a sequence of priority. This facility allows you to create data for many key combinations so that even if the batch search fails on the first key combination condition, the rest in the priority will help in the search. The Access Sequences are created separately for IM, Production, WM, and Sales. The below screenshot shows all the screens involved in the access sequence configuration.
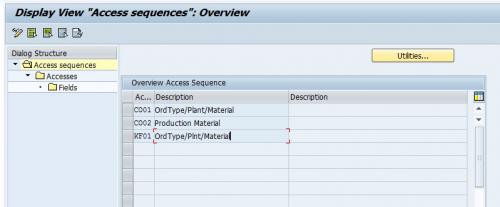
Batch Access Sequence
Create Batch Strategy Types
A Batch Search Strategy contains multiple access sequences, though not assigned in any sequential priority. The assignment of the strategy types is done separately for IM, Production, WM, and Sales. The strategy types or condition types are assigned in priority in the next step called “Batch Search Procedure Definition.”
A Batch search strategy is used to search batches using specific rules because you want to automate the process and do not want it to do it manually for every Batch. Thus, you have to aid the system in putting in a decision such as - search all the batches of a given plant, search all batches of a given set of materials within a plant, or search batches for a given component.
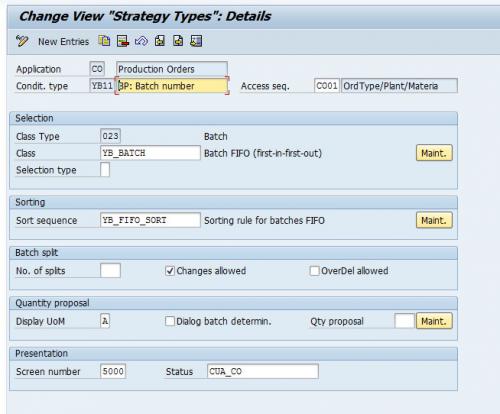
Batch Strategy Types
Create Batch Search Procedure
A Batch Search procedure contains multiple strategy types assigned in sequential priority. The Batch search procedure thus becomes the final configuration, which includes the total search configuration together. As before, the Batch Search Procedures are created separately for IM, Production, WM, and Sales.
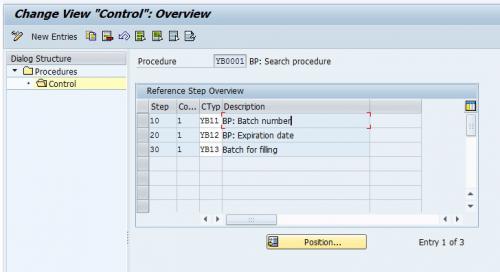
Batch Search Procedure
Batch Search Procedure Allocation and Check Activation
In this step, we allocate the batch search procedure to the respective modules. In the case of Inventory Management, the Batch search procedures are assigned to the Movement types. In the case of Production or process orders, the batch search procedures are attached to the production plants and order types.
For the Sales & Distribution module, the Batch Search Procedures are assigned to the Sales Areas and Sales document type. And finally, for Warehouse Management, the Batch Search procedures are attached to the Warehouse number and can also be assigned to the warehouse number + Movement type combination.
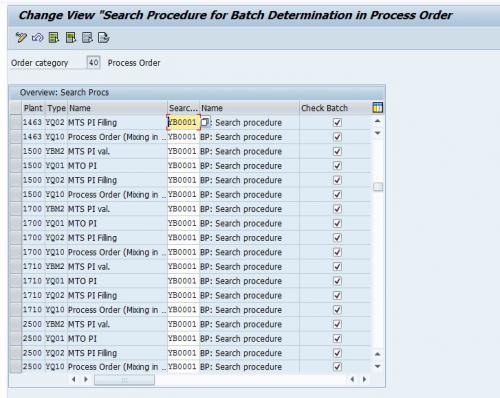
Production/Process Order Batch search procedure allocation via plants and order types
After completing the entire configuration, the Batch search condition record can be generated using these SAP transaction codes:
- For Inventory Management: MBC1 – Create, MBC2 – Change, MBC3 – Display
- For Production Order/Process Order: COB1 – Create, COB2 – Change, COB3 – Display
- For Sales & Distribution: VCH1 – Create, VCH2 – Change, VCH3 – Display
- For Warehouse Management: LS51 – Create, LS52 – Change, LS53 – Display.


